
Construction dust from a home renovation doesn’t disappear when the contractors leave. Fine particles — including drywall gypsum, silica, wood fibers, and paint residue — settle inside HVAC ductwork, on evaporator coils, in carpet fibers, and on every surface of the home. Without targeted post-renovation cleanup that addresses both visible surfaces AND the hidden interior of the HVAC system, these particles recirculate for weeks or months, degrading indoor air quality and potentially damaging the HVAC equipment itself. Studies show that homes undergoing renovation contain 5 to 8 times the normal concentration of airborne particles.
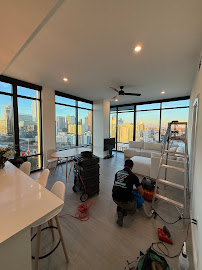
The kitchen looks incredible. The new floors are pristine. The bathroom tile gleams. Your contractor did beautiful work, and the renovation is officially complete.
But three days later, you’re wiping a thin white film off the countertops again. A week later, you notice a gritty texture on surfaces in rooms that weren’t even part of the renovation. Two weeks in, someone in the family starts coughing, or allergy symptoms flare up despite the windows being closed. And every time the HVAC system kicks on, a faint dusty smell drifts out of the vents.
This is construction dust — and it hasn’t gone anywhere. It just moved from where you can see it to where you can’t.
This guide explains exactly what renovation dust is made of, why it’s harder to remove than normal household dust, where it hides after contractors leave, what health risks it poses, and how to systematically eliminate it from your home — including the parts you can’t see.
Construction dust isn’t a single substance. It’s a complex mixture of particles generated by every cutting, sanding, drilling, and demolition activity during the project. The composition depends on what was done, but a typical home renovation produces some combination of these materials:
| Renovation Activity | Dust Particles Generated | Particle Size | Health Concern Level |
|---|---|---|---|
| Drywall hanging and sanding | Gypsum (calcium sulfate), paper fibers, joint compound | 1–100 microns; sanding produces particles under 10 microns (PM10) | Moderate — respiratory irritant; chronic exposure linked to bronchitis |
| Tile removal and cutting | Silica (crystalline silicon dioxide), cement, grout particles | 0.5–50 microns; cutting produces respirable silica under 5 microns | High — OSHA classifies respirable crystalline silica as a known lung carcinogen |
| Wood cutting and sanding | Cellulose fibers, lignin dust, wood species-specific oils | 5–100 microns; fine sanding produces particles under 10 microns | Moderate — respiratory irritant; hardwood dusts classified as carcinogens by IARC |
| Demolition of existing structures | Mixed debris: old drywall, insulation fibers, paint chips, biological matter (dust mites, mold spores, rodent droppings from wall cavities) | Highly variable; biological particles often under 5 microns | High — opens sealed wall cavities that may contain dormant mold, asbestos (pre-1980 homes), or lead paint (pre-1978 homes) |
| Concrete drilling or cutting | Silite, calcium silicate, Portland cement residue | 1–50 microns; drilling produces respirable fractions | High — same silica risks as tile work |
| Insulation removal or installation | Fiberglass strands, cellulose fibers, mineral wool particles | Variable; fiberglass splinters can be 3–5 microns in diameter | Moderate — skin and respiratory irritant; particles embed in soft surfaces |
| Painting and finishing | VOCs (volatile organic compounds) from fresh paint, stain, polyurethane; dried paint dust from sanding between coats | VOCs are gaseous (not particulate); sanding residue is 5–50 microns | Moderate to high — VOC exposure causes headaches, nausea, eye irritation; some compounds are known carcinogens at sustained levels |
| Flooring installation | Adhesive residue, underlayment dust, sawdust (hardwood), vinyl particles | 5–100 microns | Low to moderate — depends on adhesive chemistry and flooring type |
The critical distinction between renovation dust and everyday household dust is particle size. Normal household dust is mostly large particles (skin cells, fabric fibers, pet hair) that settle quickly and can be vacuumed up. Construction dust includes a significant fraction of fine particles under 10 microns (PM10) and even under 2.5 microns (PM2.5) — small enough to remain airborne for hours, penetrate standard HVAC filters, and reach the deepest parts of the respiratory system when inhaled.
Key Fact: Research cited by the Lawrence Berkeley National Laboratory found that homes undergoing active renovation contain 5 to 8 times the normal concentration of airborne particulate matter. Even after renovation work stops, fine particles can remain suspended in the air for days and continue settling on surfaces for weeks.
The visible dust — the white film on countertops, the gritty feel on floors — is actually the easy part. The harder problem is the dust you can’t see, embedded in locations that normal surface cleaning doesn’t reach.
This is the single most significant hidden reservoir. If the HVAC system ran at any point during construction — even briefly, even just the fan — it pulled dust-laden air through the return vents and distributed particles throughout the duct network. The dust settles on the interior walls of supply ducts, return ducts, trunk lines, and branch runs.
Even if contractors covered vents with plastic, no temporary seal is perfectly airtight. Pressure differentials in the house (especially when exterior doors open and close frequently during construction) push fine particles around barriers and into the duct system.
Once inside the ductwork, construction dust behaves differently from normal household dust. Drywall compound and joint compound particles are slightly adhesive when they contact a surface — they stick to duct walls rather than floating back out. This means the contamination accumulates and doesn’t self-correct. Every time the HVAC blower runs, it dislodges a small portion of this layer and pushes it into the living space, creating the “dust keeps coming back” phenomenon that drives homeowners crazy after renovations.
The evaporator coil sits directly in the airflow path, downstream of the return duct and filter. Its cold, wet surface during cooling season acts as a sticky trap — fine construction particles adhere to the condensation on the coil fins and accumulate in a layer that standard filter replacement can’t address.
This is more than a cleanliness problem. Construction dust on the evaporator coil restricts heat exchange, reduces cooling efficiency, and can cause the coil to freeze if airflow drops below critical thresholds. The U.S. Department of Energy estimates that a dirty evaporator coil can reduce HVAC efficiency by 20–30%.
When the construction dust layer on the coil absorbs moisture — which it does constantly during the cooling season — it becomes a growth medium for mold and bacteria. This is how renovation projects that happened months ago lead to musty HVAC smells that develop later in the summer.
Even if carpet was covered during construction, fine dust particles penetrate through protective coverings and settle deep into carpet fibers where surface vacuuming can’t reach them. The same applies to upholstered furniture, drapes, and fabric-covered surfaces.
Every time someone walks across the carpet, sits on the couch, or pulls back a curtain, a small cloud of embedded construction dust becomes airborne again. This is why post-renovation homes often have a persistent “dusty” quality for weeks after seemingly thorough cleaning.
Renovation dust is surprisingly pervasive. It migrates through the smallest gaps — behind new baseboards that haven’t been caulked yet, into cabinet interiors through hinge gaps, behind switch plates, and into ceiling can light housings. These become slow-release reservoirs that contribute dust for months.
If the renovation involved any work in the attic — insulation replacement, HVAC modifications, electrical runs — dust from that work settles on duct surfaces, insulation, and the attic floor. In crawl spaces, demolition debris can fall through floor penetrations. These spaces are out of sight and typically the last to be cleaned (if they’re cleaned at all).
After Professional Cleaning | Before Duct Cleaning | Condition |
Reduced airborne particles | Continuous recirculation | Allergen Circulation |
Shorter, efficient cycles | Longer cycles | HVAC Run Time |
Noticeably fresher air | Musty or stale | Odor Levels |
Normal maintenance intervals | More frequent | Filter Replacement Frequency |
Improved efficiency | Higher | Energy Consumption |
Renovation dust does not disappear on its own. Even weeks after visible cleaning, fine particles remain embedded in duct systems. Addressing contamination at the source protects long-term system performance.
Construction dust exposure matters because the particles involved are fundamentally different from everyday dust — both in chemical composition and in size.
For most healthy adults, short-term exposure to post-renovation dust causes irritation rather than lasting harm: coughing, sneezing, runny nose, itchy eyes, scratchy throat, and mild headache. These symptoms are the body’s natural response to inhaling irritant particles and usually resolve once the dust source is eliminated.
The picture changes significantly for vulnerable populations:
Children breathe faster than adults relative to their body weight, inhaling more particles per kilogram of body mass. Their developing respiratory systems are also more susceptible to irritant damage. Children who crawl or play on floors have direct contact with settled dust.
Older adults and people with existing respiratory conditions (asthma, COPD, chronic bronchitis) can experience symptom exacerbation from construction dust exposure that a healthy adult would tolerate without noticeable effect.
Pregnant women should minimize exposure to construction dust, particularly dust containing VOCs from fresh paint and finishes, and any dust from pre-1978 homes that may contain lead.
Key Fact: Homes built before 1978 may contain lead-based paint. Disturbing this paint during renovation creates lead dust, which the CDC identifies as the primary cause of childhood lead poisoning. Homes built before 1980 may also contain asbestos in floor tiles, insulation, and joint compounds. Both require specialized abatement — not standard cleaning — if disturbed during renovation.
If your renovation involved demolition or surface disturbance in a pre-1978 home and the contractor did not follow EPA RRP (Renovation, Repair, and Painting) Rule protocols, professional testing for lead and asbestos may be warranted before occupying the space.
Effective post-renovation cleaning follows a specific sequence — top to bottom, dry before wet, hidden before visible. Skipping steps or cleaning out of order just redistributes dust rather than removing it.
Before touching any surfaces, clear the airborne particles first. Open windows on opposite sides of the home to create cross-ventilation. Run a portable HEPA air scrubber (available for rent at most equipment rental stores) for 24–48 hours. Replace the HVAC air filter — the filter that was in place during construction is likely saturated and should be discarded, not cleaned.
If the renovation involved painting or finishing, allow 48–72 hours of ventilation before sealing the home back up. VOCs off-gas most aggressively during the first 48 hours after application.
Start at the highest surfaces and work down. Dust settles with gravity, so cleaning lower surfaces first means they’ll be re-contaminated by particles falling from above.
Ceiling and crown molding: Use an extendable microfiber duster. Don’t use a feather duster — it just redistributes fine particles.
Walls: Wipe with a damp microfiber cloth, working in horizontal sections. Drywall dust is slightly alkaline and responds well to a diluted white vinegar solution (1 cup per gallon of water).
Light fixtures, fans, and high shelves: Remove glass fixtures and wash separately. Wipe fan blades with a damp cloth.
Window tracks and sills: These collect significant amounts of construction dust. Use a vacuum crevice attachment first, then wipe with a damp cloth.
Baseboards and trim: Wipe with a damp microfiber cloth. Pay attention to the gap between new baseboards and flooring — dust accumulates here and slowly releases.
Hard floors: Vacuum first with a HEPA-filtered vacuum (not a broom — sweeping sends fine particles airborne). Then wet-mop with a microfiber mop and clean water. You may need to mop 2–3 times, changing water frequently, to fully remove the film.
Carpet: HEPA vacuum thoroughly — ideally with a commercial-grade unit or a rental. Consider professional hot-water extraction (steam cleaning) for carpets that were in place during construction. Standard vacuuming removes surface particles but doesn’t reach the embedded layer.
Upholstered furniture: HEPA vacuum all fabric surfaces. For heavily exposed pieces, professional upholstery cleaning is recommended.
Inside cabinets and drawers: If cabinets were installed or nearby during construction, remove contents, vacuum interiors, and wipe with a damp cloth before replacing items. Kitchen cabinets that were adjacent to demolition work may contain enough residual dust to contaminate dishes and food storage.
This is the step that most homeowners skip — and it’s the reason dust keeps coming back for weeks after they’ve thoroughly cleaned every visible surface.
Step 1: Replace the filter again. The filter you installed in Phase 1 has been catching dislodged construction dust for a week. Replace it with a clean MERV 11 filter.
Step 2: Clean all vent covers. Remove every supply and return grille, soak in warm soapy water, scrub, and dry before reinstalling. This removes the visible dust layer that sits right at the entry point to your rooms.
Step 3: Assess the duct interior. Look inside the duct opening (with the grille removed) using a flashlight. If you see a visible layer of fine white or gray dust on the duct walls — especially in the first 12–18 inches — the interior of the system is contaminated beyond what homeowners can address with household tools.
For systems with significant interior contamination, professional interior cleaning of the ventilation system uses sealed negative-pressure equipment and agitation tools to extract the accumulated construction debris from the full length of every duct run — including trunk lines and branch connections that a shop vac can’t reach.
Step 4: Professional coil cleaning. If the HVAC system ran during any part of the construction, the evaporator coil almost certainly has a layer of construction dust on it. A professional coil cleaning removes this layer, restores heat exchange efficiency, and prevents the damp dust from developing into a mold problem as the cooling season progresses.
Even after thorough cleaning, residual construction dust continues to emerge from hidden reservoirs (behind baseboards, inside electrical boxes, from carpet padding) for 4–8 weeks. During this period:
Run the HVAC system in fan-only mode for 15–20 minutes daily to pass air through the filter without cooling or heating — this increases the number of filtration cycles and captures particles as they become airborne.
Replace the HVAC filter at 30-day intervals for the first two months post-renovation (instead of the normal 60–90 day interval).
Damp-wipe high-touch surfaces weekly. If the white film returns noticeably within 48 hours, hidden reservoirs are still releasing particles and additional investigation may be needed.
Not every renovation generates the same dust load. Here’s a practical guide for matching cleanup intensity to project scope.
| Renovation Scope | Typical Dust Load | Recommended Cleanup Level | HVAC System Attention Needed? |
|---|---|---|---|
| Cosmetic only (painting, minor trim, fixture swaps) | Low — mainly paint VOCs and minor sanding dust | Surface cleaning + ventilation; replace HVAC filter once | Filter replacement only; coil and duct cleaning usually unnecessary |
| Single-room remodel (kitchen or bathroom) | Moderate — drywall dust, tile dust, adhesive residue | Full cleanup protocol Phases 1–4; focus on adjacent rooms as well | Filter replacement + vent cleaning; duct interior inspection recommended |
| Multi-room renovation (kitchen + bath + flooring) | High — dust migrated throughout the home during weeks of work | Full protocol all phases; consider professional surface cleaning for large homes | Professional coil cleaning + duct interior inspection; likely needs full system cleaning |
| Whole-house renovation or gut remodel | Very high — every surface and system was exposed; wall cavities opened | Full protocol + professional post-construction cleaning crew | Professional system cleaning essential; coil, ducts, and return plenum all contaminated |
| Addition or structural work | Very high + exterior dust intrusion from framing and roofing | Full protocol + attic and crawl space inspection for debris | Full system cleaning; inspect and replace attic insulation contaminated during the project if exposed to debris |
| Pre-1978 home renovation with surface disturbance | Variable, but potentially hazardous (lead paint, asbestos risk) | Professional testing before DIY cleanup; may require certified abatement | Do NOT run HVAC until testing confirms absence of lead/asbestos; professional remediation if present |
Here’s a complication specific to the Carolinas that homeowners in drier climates don’t face. Construction dust is dry when it’s generated. But when that dust settles inside an HVAC system in a region where cooling-season humidity regularly exceeds 70%, the dust absorbs moisture from condensation on the evaporator coil and from humid air passing through the ducts.
Damp construction dust becomes a growth medium. The organic components (wood fibers, cellulose, paper from drywall tape) provide nutrients. The moisture provides the water activity. The dark, enclosed environment provides the ideal incubation temperature. Within weeks, bacterial colonies and mold can establish on what started as simple drywall dust.
This is why renovation projects completed in spring or early summer in the Carolinas carry higher mold risk than the same projects completed in winter. The dust enters the system dry, but the cooling season wets it before anyone thinks to clean the ducts.
Key Fact: The CDC states that mold can begin colonizing damp organic material within 24–48 hours. Construction dust containing cellulose (drywall paper, wood fibers) that settles on a damp evaporator coil during Charlotte’s cooling season provides an ideal growth substrate.
For homes where post-renovation mold has already developed inside the HVAC system, addressing mold that colonizes damp construction residue inside HVAC components requires containment protocols that prevent cross-contamination during removal — a step beyond standard cleaning.
A common point of confusion: whose job is it to clean the HVAC system after renovation?
Most general contractors include a basic “broom clean” in their scope — sweeping floors, removing construction debris, and wiping down visible surfaces. Some higher-end contractors also include HVAC filter replacement and vent cover cleaning. Very few include duct interior cleaning or coil cleaning, because these are specialized services outside a general contractor’s scope.
| Cleanup Task | Typically Contractor’s Job | Typically Homeowner’s Responsibility |
|---|---|---|
| Remove construction debris and materials | Yes | — |
| Broom-sweep and basic surface wipe | Yes | — |
| Detailed surface cleaning (walls, trim, windows) | Sometimes (depends on contract) | Often falls to homeowner or cleaning service |
| HVAC filter replacement | Sometimes | Usually homeowner |
| Vent cover removal and cleaning | Rarely | Homeowner |
| Duct interior inspection and cleaning | No — outside GC scope | Homeowner arranges with HVAC service provider |
| Evaporator coil cleaning | No — outside GC scope | Homeowner arranges with HVAC service provider |
| Carpet deep cleaning / steam extraction | Rarely | Homeowner |
| Lead and asbestos testing (pre-1978 homes) | Required by EPA RRP Rule for certified renovators | Homeowner’s responsibility to verify compliance |
When getting renovation bids, ask specifically what the cleanup scope includes. Getting the cleanup expectations in writing prevents the “I thought the contractor would handle that” frustration.
| Time After Renovation | What’s Happening | What to Do |
|---|---|---|
| Days 1–3 | Heavy visible dust on all surfaces; high airborne concentration; VOCs off-gassing from paint and finishes | Ventilate aggressively; run HEPA air scrubber; replace HVAC filter; avoid spending prolonged time in the space |
| Days 3–7 | Surface dust settles; air quality improving but still elevated; fine particles still airborne | Begin top-to-bottom surface cleaning protocol; second filter replacement |
| Weeks 1–2 | Most visible dust removed from surfaces; HVAC system still contaminated internally; dust re-emerging from hidden reservoirs | HVAC system cleaning phase — vents, ducts, coil; deep clean carpets and soft furnishings |
| Weeks 2–4 | Slow trickle of dust from behind baseboards, inside electrical boxes, cabinet interiors | Continue 30-day filter replacement; damp-wipe weekly; monitor for musty HVAC smells |
| Weeks 4–8 | Residual dust diminishing; if dust is still noticeably returning, hidden reservoirs remain | Investigate remaining sources — check attic, crawl space, behind new cabinets; consider professional air quality test |
| After 8 weeks | If dust still persists, the issue is likely the HVAC system recirculating embedded contamination | Professional duct and coil cleaning if not already done; system may need a second cleaning pass |
Heavy particles (visible dust) settle within hours of construction activity stopping. Fine particles under 10 microns can remain airborne for 1–3 days in still indoor air. Ultrafine particles under 2.5 microns can stay suspended for up to a week. However, the total time your home feels dusty is much longer — typically 4–8 weeks — because hidden reservoirs (ductwork, carpet padding, wall cavities) continue releasing particles that become airborne with normal household activity.
Yes. Construction dust — especially drywall compound and joint compound — coats evaporator coil fins and restricts heat exchange, potentially reducing cooling efficiency by 20–30%. Heavy accumulation can restrict airflow enough to cause the evaporator coil to freeze. Dust that enters the blower motor housing can accelerate bearing wear. And dust that settles in the drain pan can clog the condensate drain line, causing water backup and potential water damage.
Ideally, no. Turning off the HVAC system during active dust-generating work is the single best way to prevent duct contamination. If the renovation happens during Charlotte’s summer and the system must run for temperature control, seal return vents in and near the work area with plastic and tape, and replace the filter weekly during the active construction phase.
For most healthy adults, short-term exposure causes temporary irritation — coughing, sneezing, scratchy throat. However, drywall joint compound can contain silica, and prolonged or heavy exposure to silica dust is a serious health concern. OSHA classifies respirable crystalline silica as a cause of silicosis, lung cancer, and other respiratory diseases. Children, elderly adults, and anyone with existing respiratory conditions should avoid prolonged exposure to drywall dust.
If you’re still noticing abnormal dust levels more than 8 weeks after renovation, the most likely explanation is that the HVAC system is recirculating construction dust that’s embedded inside the ductwork and on the evaporator coil. Surface cleaning can’t address this reservoir — it requires professional internal system decontamination. A secondary possibility is that hidden reservoirs behind new construction (inside cabinet kickspaces, behind appliances, in wall cavities that weren’t sealed) are slowly releasing trapped dust.
Potentially, yes. If the renovation disturbed painted surfaces, there is a risk of lead paint dust. The EPA’s RRP (Renovation, Repair, and Painting) Rule requires contractors working in pre-1978 homes to use lead-safe work practices and conduct post-renovation cleaning verification. If you’re unsure whether your contractor followed these protocols, a lead dust wipe test (available from certified environmental testing labs) can determine whether hazardous lead levels are present. This is especially important in homes with young children.
After. Always complete all dust-generating work first, then clean the HVAC system last. Cleaning ducts before painting or sanding means the newly cleaned system immediately re-contaminates. The optimal sequence is: finish all construction work → ventilate → clean surfaces → clean HVAC system → begin normal occupancy.
For a typical Charlotte-area home with a single HVAC system, professional duct and coil cleaning after renovation ranges from $400–$800 depending on the system size and contamination level. For homes with multiple systems or severe contamination from gut renovations, costs can reach $1,000–$1,500. This is a fraction of the cost of the renovation itself and protects both the family’s health and the HVAC equipment’s longevity.


(843) 864-4649
Let us help you breathe easier and enjoy a fresher indoor environment with our professional air duct cleaning solutions.
Subscribe to our newsletter to get our latest updates and news.
Fill out the form below to book an appointment with us